
File Checker: Preparazione dei file per la stampa con il sistema Preflight


Automatyzacja zakupów, sprawniejszy przepływ zamówienia przez sklep internetowy oraz utrzymanie wysokiej jakości druku. To najważniejsze plusy, jakie oferuje nasz File Checker, czyli system sprawdzania plików przed dopuszczeniem ich do druku. Zobacz, jak działa nasze narzędzie oraz jak z niego korzystać.
Co to jest File Checker?
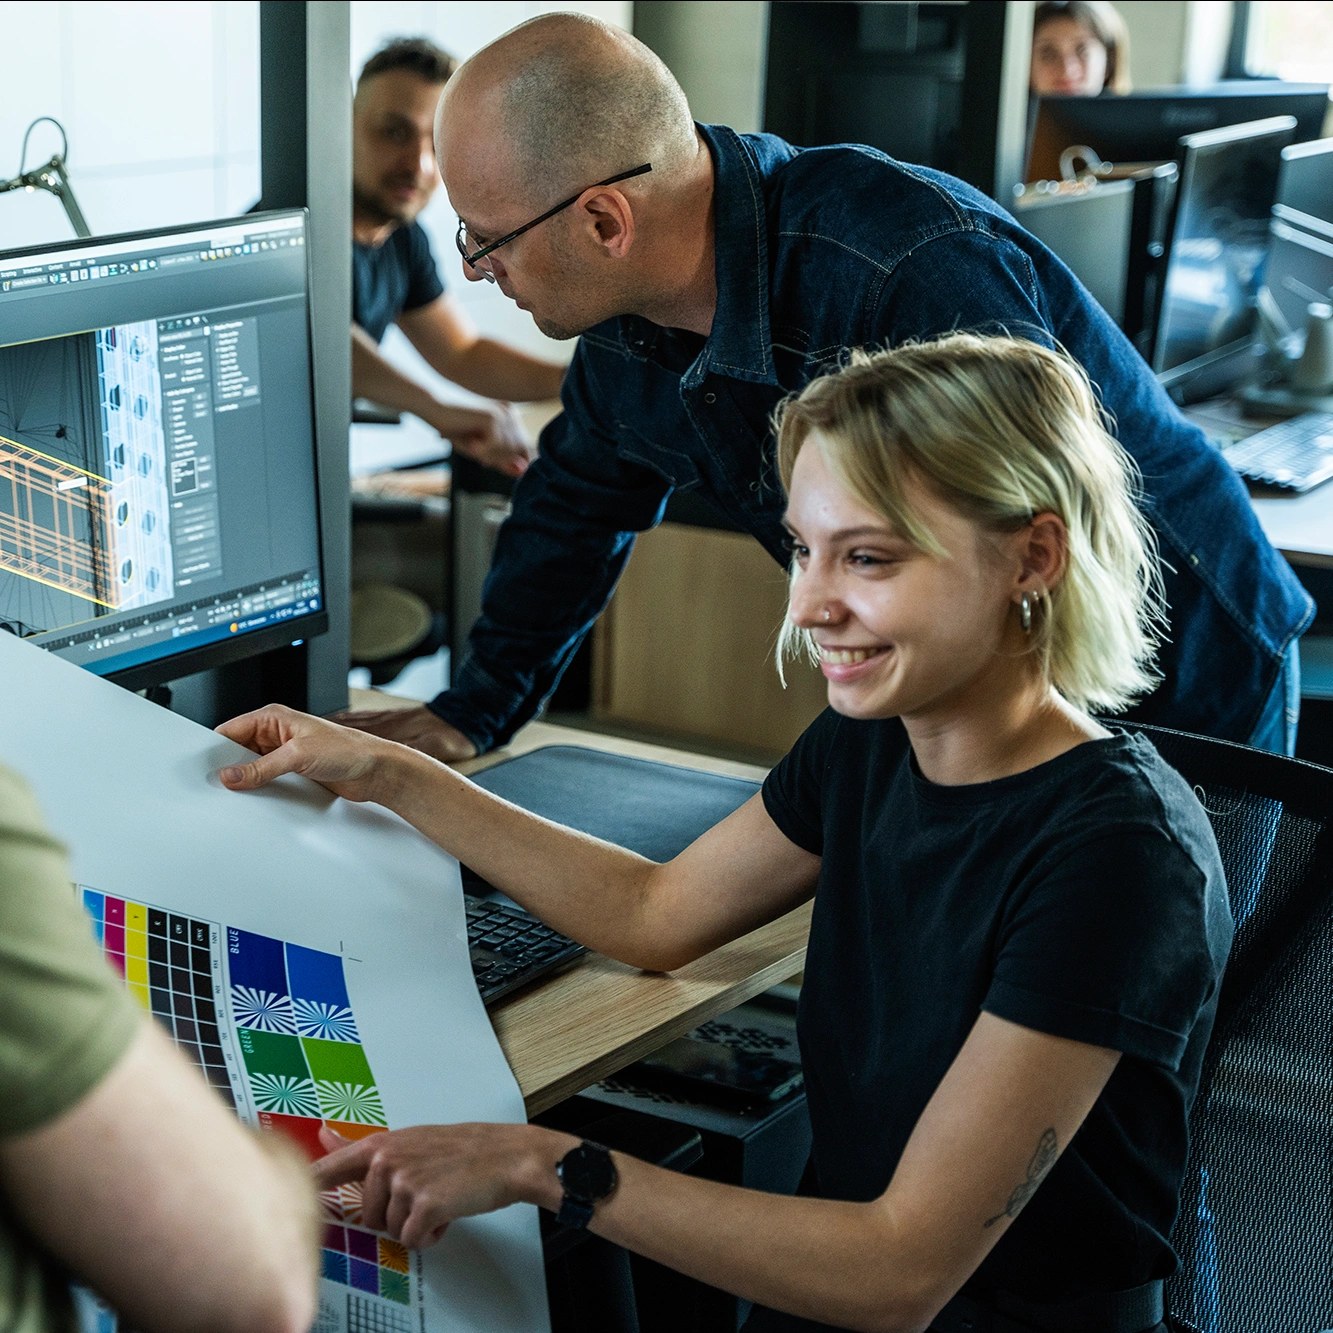
Omawiane w tym artykule narzędzie działa na zasadzie systemu Preflight. To rozwiązanie dobrze znane w drukarstwie, które służy automatyzacji i weryfikacji plików. Po wgraniu plików graficznych w karcie produktu, nasz system dokona automatycznej weryfikacji. Jeśli grafiki są poprawne, system dopuści zamówienie do dalszego etapu realizacji. Jeśli jednak wykryje błędy, wskaże dokładnie jakie elementy należy poprawić. To bardzo wygodne narzędzie, które pozwala szybko zidentyfikować błędy i je poprawić.
Ponadto system tego typu pozwala nam utrzymać wysoką jakość produkcji, ponieważ dopuszcza jedynie grafiki, które spełniają wyśrubowane standardy. Co więcej, dzięki temu systemowi możesz w pełni samodzielnie złożyć zamówienie w naszym sklepie. File Checker eliminuje potrzebę udziału w całym procesie pracowników naszego sklepu. A to z kolei oznacza, że zamówienie możesz złożyć w najdogodniejszym dla ciebie czasie.
Musisz też wiedzieć, że dzięki temu jesteśmy w stanie w bezkonkurencyjnie szybkim czasie zrealizować twoje zamówienie. Po zaakceptowaniu plików i opłaceniu zamówienia, zlecenie trafia bezpośrednio do produkcji.
Jakie formaty plików obsługuje File Checker?
Dotychczas nasze narzędzie obsługiwało jedynie format PDF. Obecnie można wgrać pliki w aż czterech formatach: PDF, TIF, JPG oraz PNG. Dzięki temu, jeśli system odrzucił pliki jako błędne, np. z powodu braku spłaszczenia, po zapisie do formatu TIF lub JPG nastąpi automatyczne połączenie wielu warstw w jeden obraz. Co więcej format TIF to format zapisu najczęściej stosowany w pracy grafików. Jeśli twoje pliki przygotowuje specjalista, możliwość zapisu w takim formacie ułatwi mu pracę.
Jak korzystać z narzędzia?
File Checker to intuicyjne i łatwe w obsłudze narzędzie. Praca z tym systemem jest bardzo łatwa, ale aby dodatkowo przybliżyć ci ten proces, poniżej opisaliśmy najważniejsze kroki, jakie dzielą użytkownika od momentu kliknięcia “dodaj do koszyka” do poprawnego przesłania plików.
Krok pierwszy
Wybierz produkt i dodaj go do koszyka.
Krok drugi
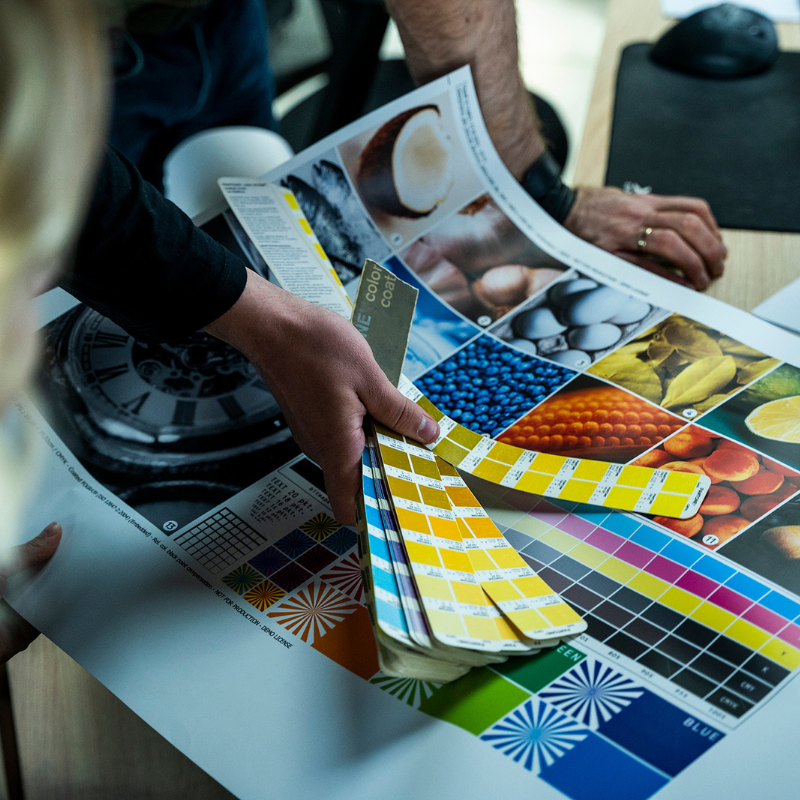
Zapoznaj się z wytycznymi. Na podstronie koszyka znajdziesz plik PDF, w którym zebrane są wytyczne druku dla każdego produktu (dostęp do tego pliku jest również możliwy na karcie produktu, jeszcze przed dodaniem go do koszyka).
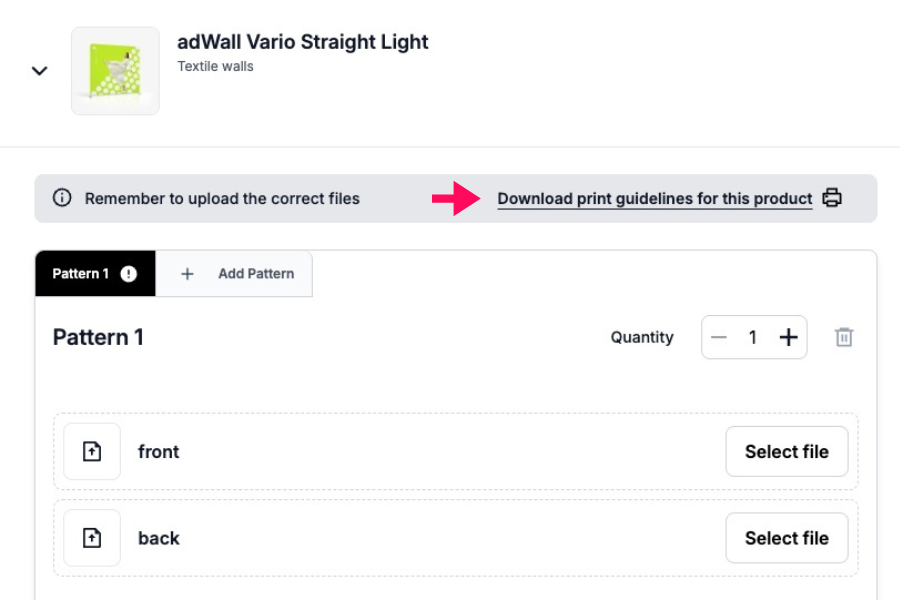
Znajdziesz tam m.in. takie wskazówki, jak: odpowiedni sposób zapisu (plik spłaszczony, bez warstw), zamiana fontów na krzywe czy sugerowane składowe koloru czarnego). Przeanalizuj dokładnie wytyczne i przygotuj swoje pliki zgodnie z tymi wskazówkami.
Na kolejnych stronach pobranego pliku znajdziesz szablon, który możesz otworzyć w dowolnym programie graficznym (Adobe Photoshop, Illustrator, CorelDRAW). To właśnie za jego pomocą przygotujesz plik do druku. Pamiętaj, aby po zakończeniu pracy usunąć z szablonu czerwoną i niebieską linię przed zapisaniem plików.
Krok trzeci
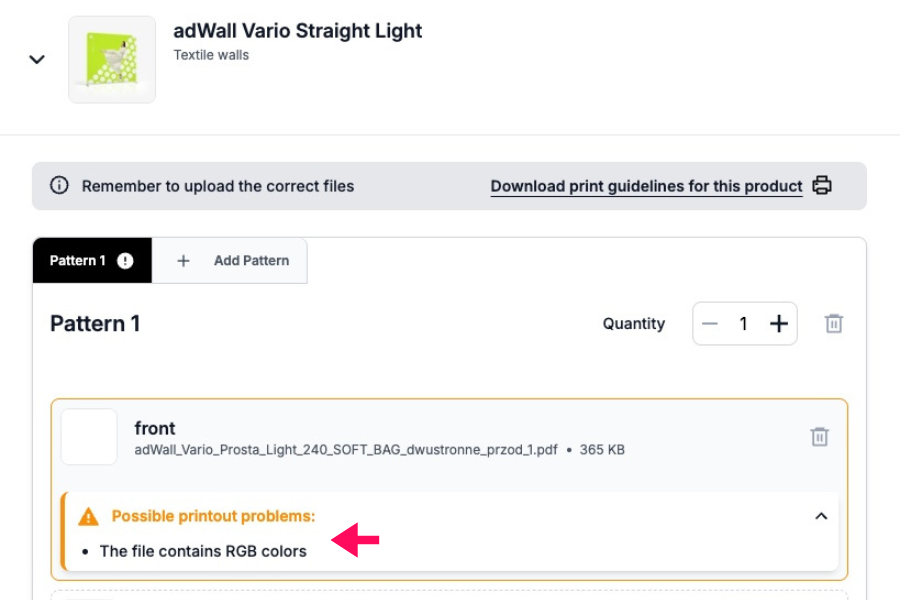
Prześlij pliki graficzne. Poniżej nazwy produktu dodanego do koszyka znajdziesz okienko, za pomocą którego dodasz pliki. Jeśli wszystko jest w porządku, zobaczysz komunikat podświetlony na zielono. Jeśli pliki okażą się błędne, system poinformuje cię o tym komunikatem podświetlonym na pomarańczowo. Co ważne, system wskaże ci, co należy poprawić, aby pliki zostały zaakceptowane.
Przeczytaj również: Jak poprawnie przygotować pliki?
Jeśli mimo wskazówek naszego systemu, wciąż masz problem z poprawnym przygotowaniem plików do druku, możesz wybrać opcję ręcznego sprawdzenia grafik przez naszych specjalistów. Taka usługa jest jednak dodatkowo płatna.
Krok czwarty
Sprawdź, jak będzie wyglądał twój produkt. Warto wiedzieć, że po zaakceptowaniu plików przez system, możesz sprawdzić, jak twój produkt będzie się prezentował. I co więcej, możesz się o tym przekonać na dwa sposoby.
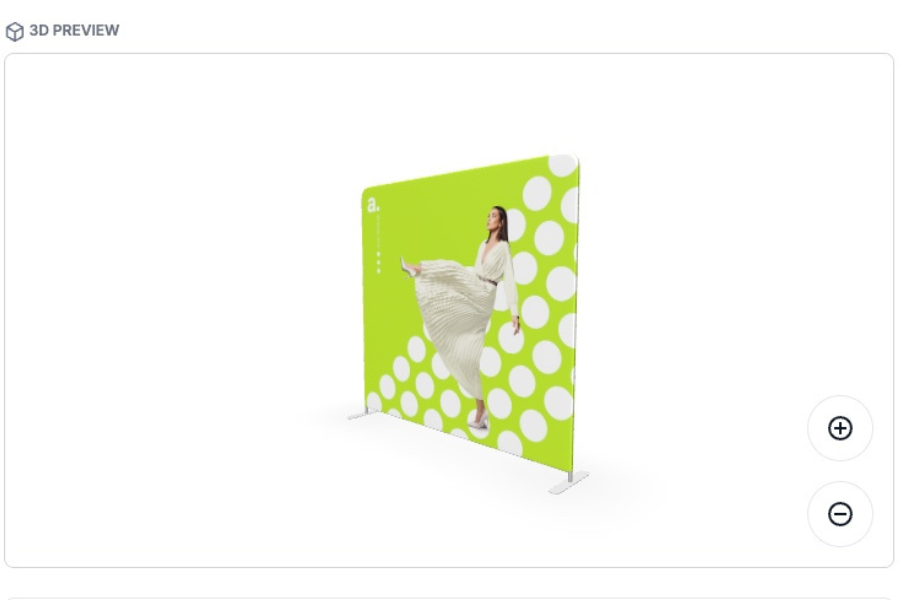
Nasza strona oferuje podgląd 3D. Możesz swobodnie obracać produkt, przybliżać go i oddalać. Dzięki temu dokładnie przekonasz się, jak wybrana grafika będzie prezentować się na danej trybunce czy kasetonie.
Druga opcja, jaką przygotowaliśmy, to podgląd w rzeczywistości rozszerzonej AR. Wystarczy, że za pośrednictwem przycisku na naszej stronie wygenerujesz kod QR, który następnie zeskanujesz za pomocą swojego telefonu. W efekcie będzie możliwe sprawdzenie, jak produkt prezentuje się w wybranym pomieszczeniu w skali 1:1.
Jak widzisz File Checker oraz wspierające go narzędzia podglądu mogą znacznie usprawnić proces zakupowy w naszym sklepie. Teraz pozostaje ci wybrać produkt, który wykorzystasz w promocji marki, złożyć zamówienie, a resztę zostawić nam – przygotujemy wyrób, który stanie się efektowną wizytówką twojego brandu.


- Stampa
 Rivoluzione nella produzione dei pannelli LED luminosi – più veloce e più precisa
Non ami l’atmosfera frenetica prima di una fiera? Nemmeno noi. Per questo motivo, invece di inseguire il tempo, abbiamo deciso di anticiparlo. Nel nostro parco macchine abbiamo introdotto un nuovo dispositivo – il plotter da taglio ZUND. ZUND automatizza il processo di taglio, aumenta la precisione e riduce al minimo il rischio di errore. Scopri come questa nuova macchina può accelerare la realizzazione del tuo prossimo ordine.
Leggere di più
- Stampa
 Come preparare i file passanti? Guida passo dopo passo
Stai pianificando un’esposizione composta da più elementi di un sistema, ma con un’unica grafica comune? Scopri come preparare correttamente i file passanti per evitare spostamenti e correzioni prima della stampa.
Leggere di più - NotizieCaso di studio
 Studio di caso: la partecipazione di adsystem alla conferenza I Love Marketing
Oltre 100 lead acquisiti, relazioni commerciali di valore e un autentico effetto “wow”: così possiamo riassumere in poche parole la nostra partecipazione all’edizione di quest’anno della conferenza I Love Marketing & Technology. Se sei curiosa/o di sapere come ci siamo preparati a questo evento e quali azioni abbiamo intrapreso per promuovere il brand adsystem, ti invitiamo a leggere questo case study.
Leggere di più - MarketingStampa
 Tecnologia AR: dalla visualizzazione alla realizzazione
La tecnologia AR è un supporto moderno nel processo di acquisto. Aiuta a evitare errori e a non comprare, come si suol dire, a scatola chiusa. Scopri cos’è davvero questa tecnologia e come può esserti utile durante lo shopping online.
Leggere di più - Stampa
 Verifica dei file: la chiave per una gestione dell’ordine senza intoppi
Non sei sicuro che i tuoi file rispettino le linee guida? Su adsystem utilizziamo un sistema avanzato di File Checker e l’esperienza dei nostri grafici per eliminare gli errori tecnici sin dalle prime fasi del processo. Scopri cosa include la nostra verifica e a cosa devi prestare attenzione come cliente.
Leggere di più