

Jak przygotować pliki pasowane? Poradnik krok po kroku

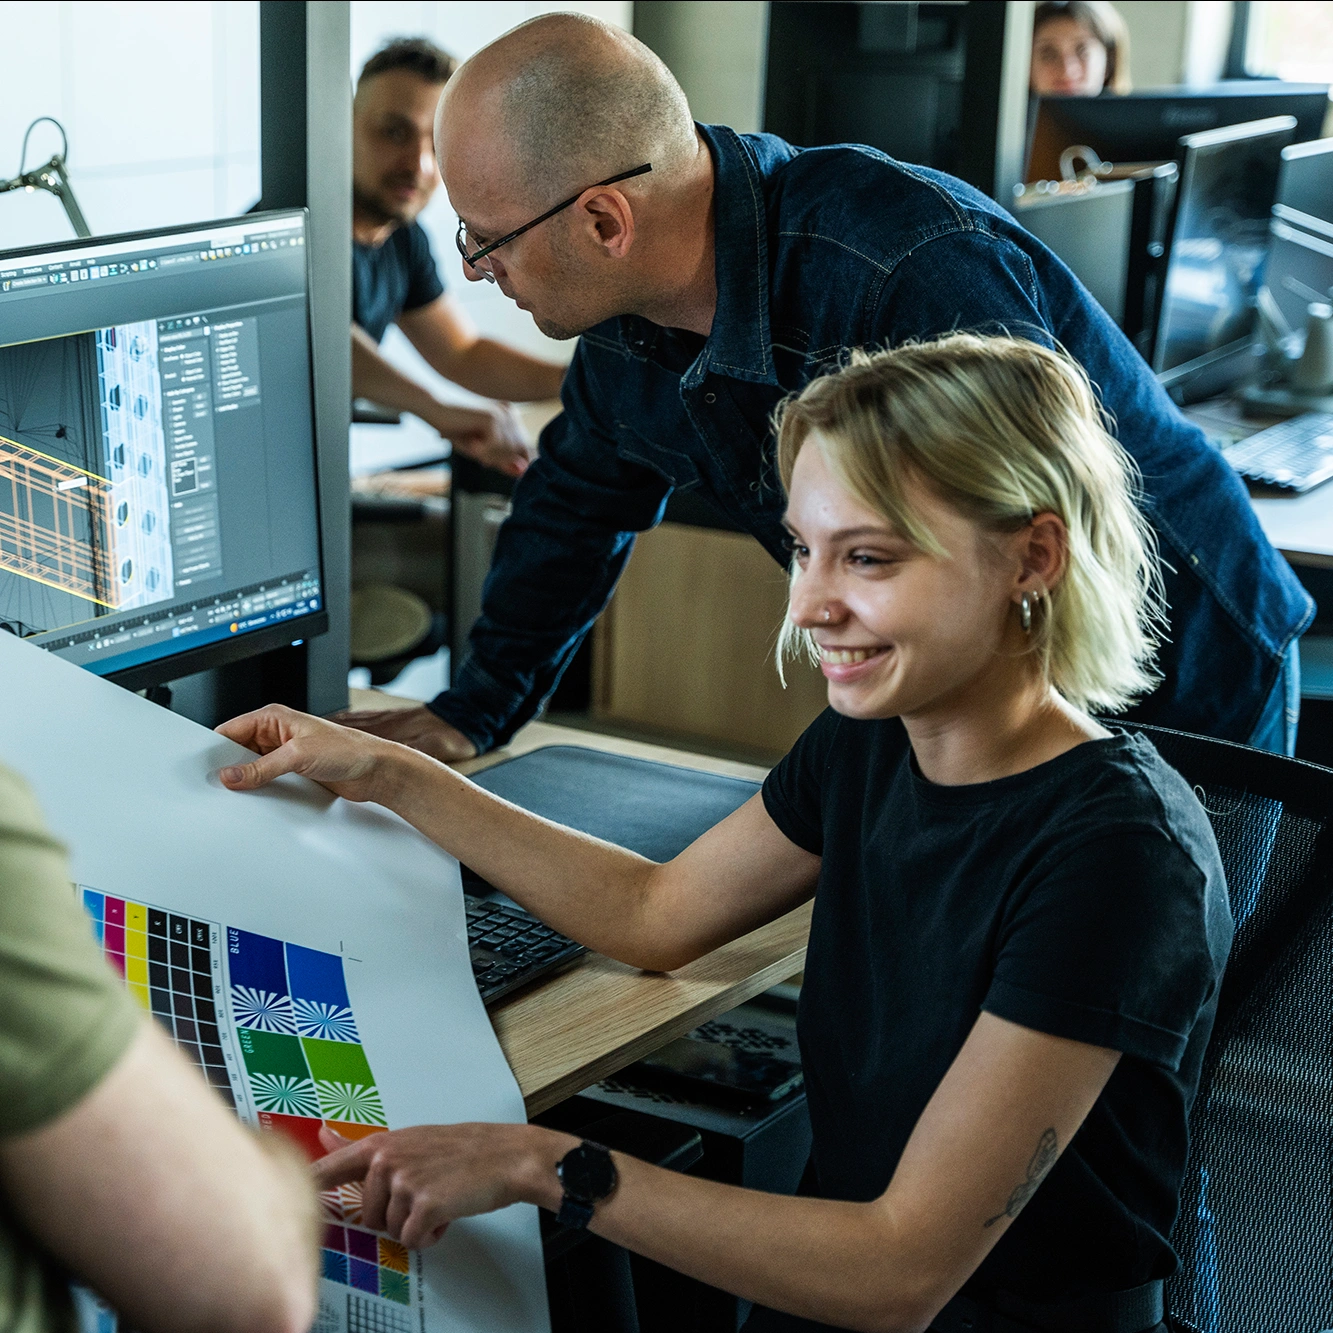
Planujesz ekspozycję złożoną z kilku elementów danego systemu, ale z jedną wspólną grafiką? Sprawdź, jak poprawnie przygotować pliki pasowane, aby uniknąć przesunięć i poprawek przed drukiem.
Kiedy i po co stosować pliki pasowane?
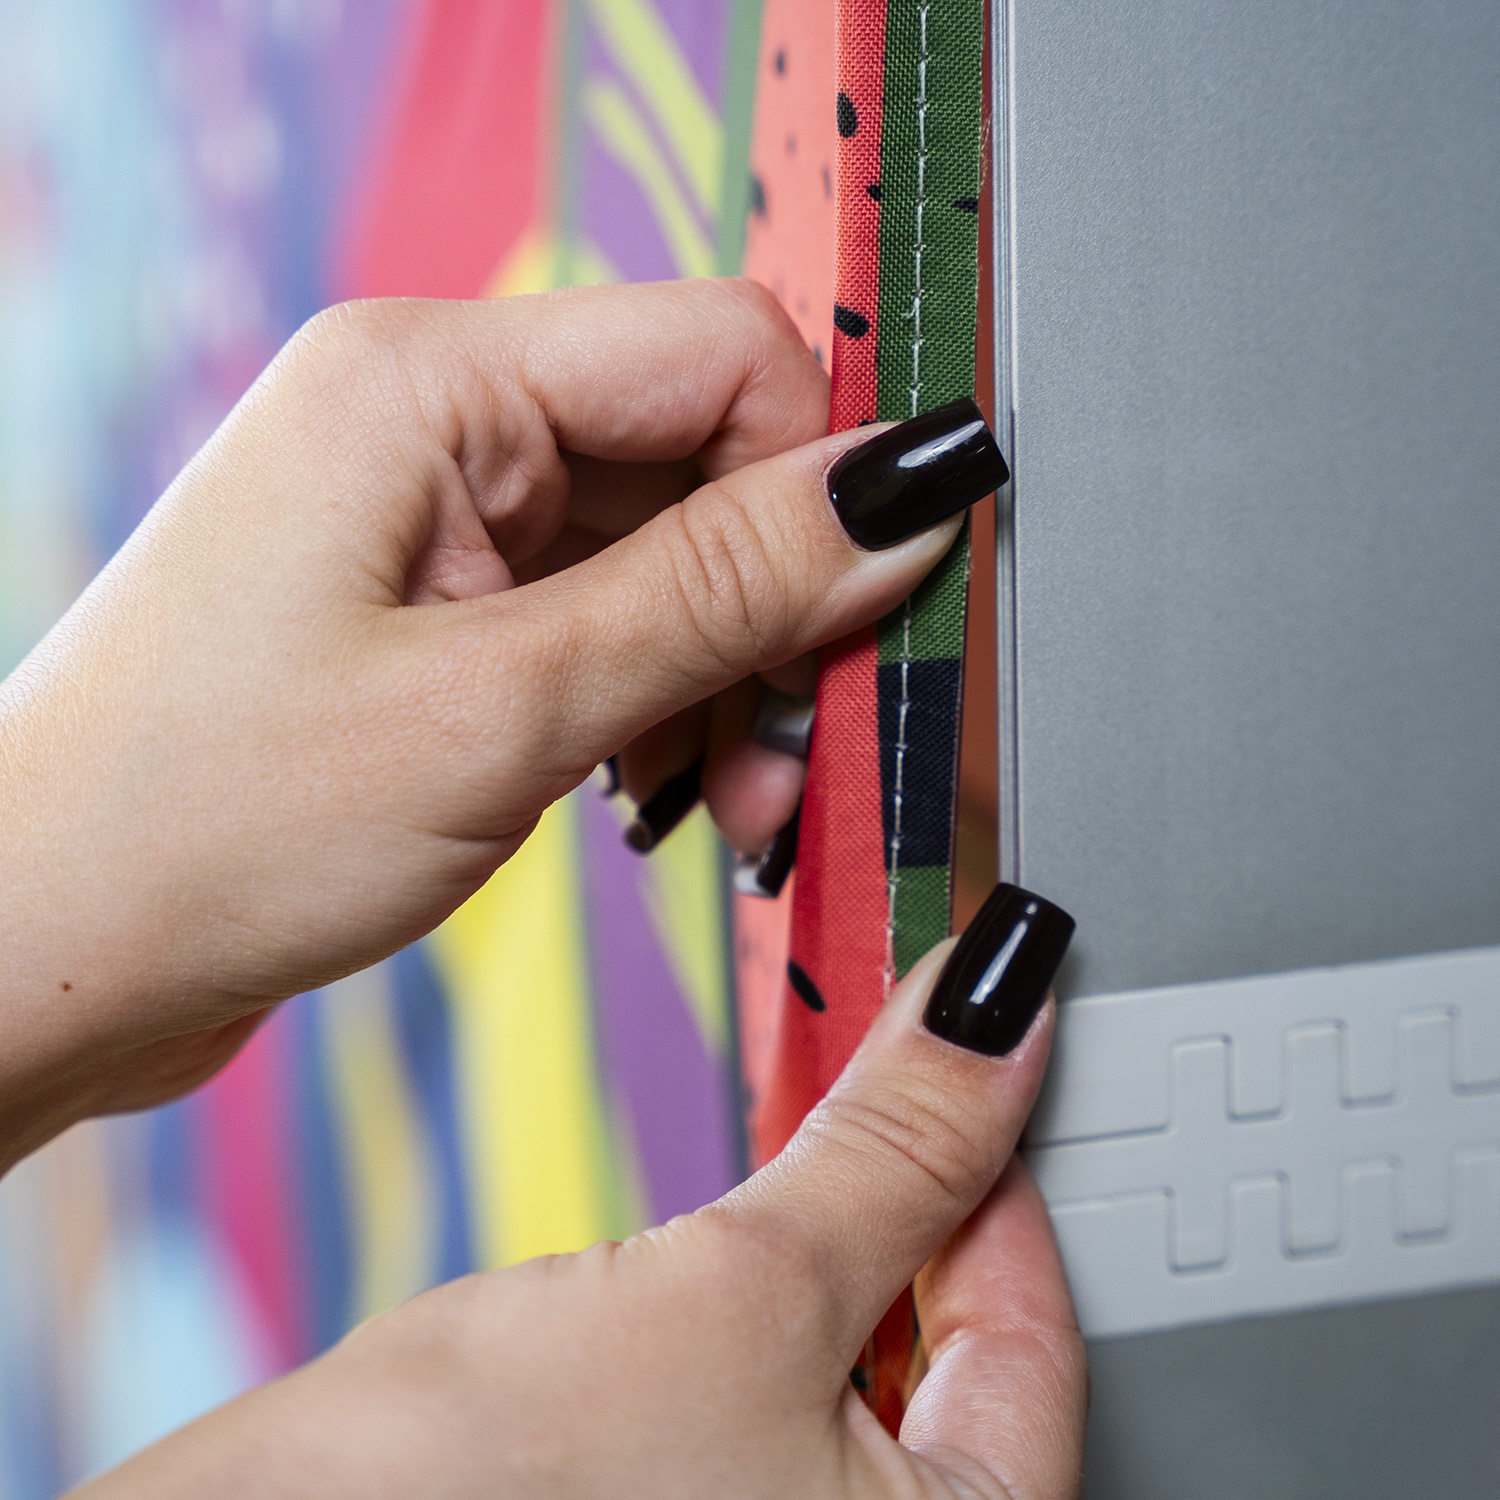
Pliki pasowane należy przygotować zawsze wtedy, gdy chcesz połączyć kilka prostokątnych elementów w jedną grafikę. Najczęściej chodzi o ramy tekstylne albo kasetony LED, ustawione obok siebie. Dzięki pasowaniu możesz mieć pewność, że całość będzie wyglądać jak jeden obraz, a nie kilka osobnych paneli.
Aby przygotować pliki pasowane, projekt należy podzielić na kilka plików. Każdy z nich powinien zawierać fragment grafiki z poprzedniego. Ten powtarzający się fragment to tzw. obszar wspólny, który pozwala zachować ciągłość obrazu.
Dlaczego to takie ważne? Między systemami zawsze pojawiają się drobne przerwy i przesunięcia wynikające z obszywania kedrem, krojenia, grubości profili czy samego montażu. Dodatkowo materiał potrafi się minimalnie skurczyć, a część grafiki jest przeznaczona na obszary techniczne. Gdy pliki są przygotowane „na styk”, linie i wzory łatwo się rozjeżdżają, a boczne krawędzie zawinięte do środka ram i obszyte kedrem, przełamują kontynuację obrazu. Dzięki obszarowi wspólnemu grafika układa się w spójną całość – przechodzi płynnie z jednej ramy na drugą i wygląda dokładnie tak, jak zakładał projekt.
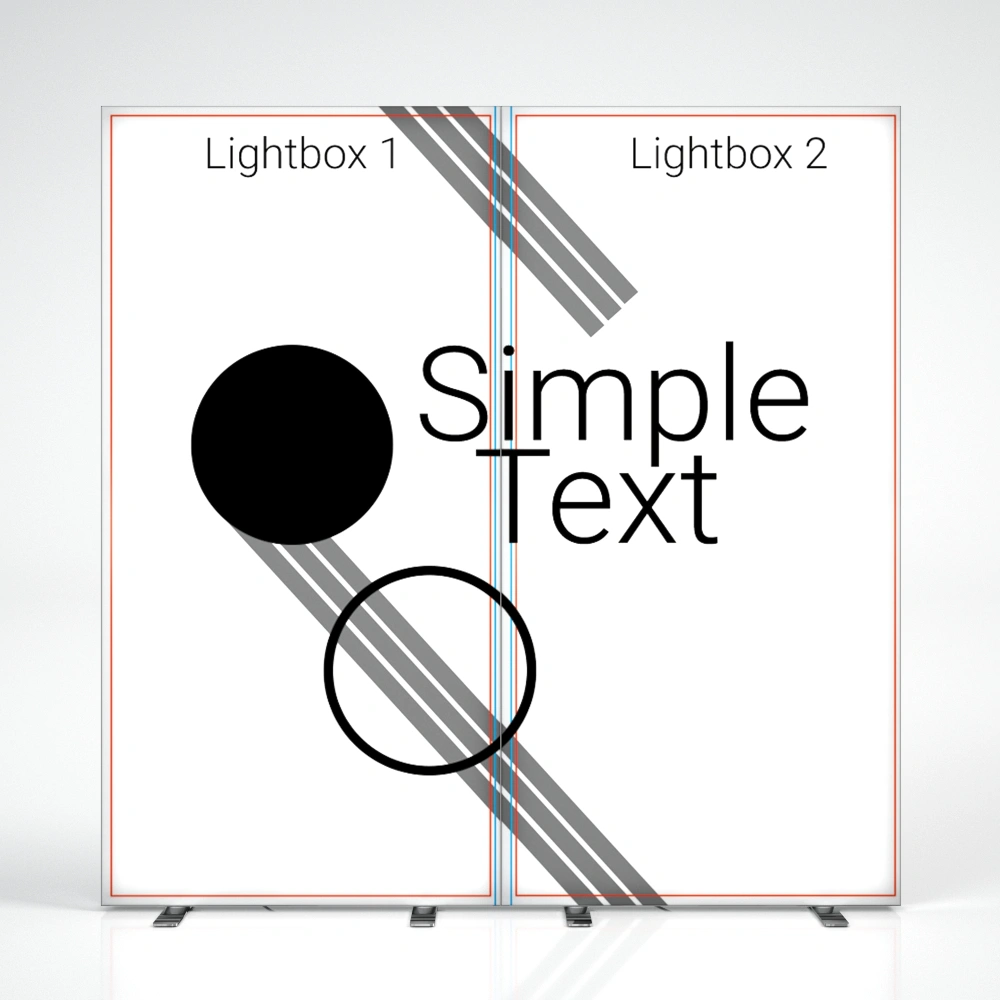
Dobrze
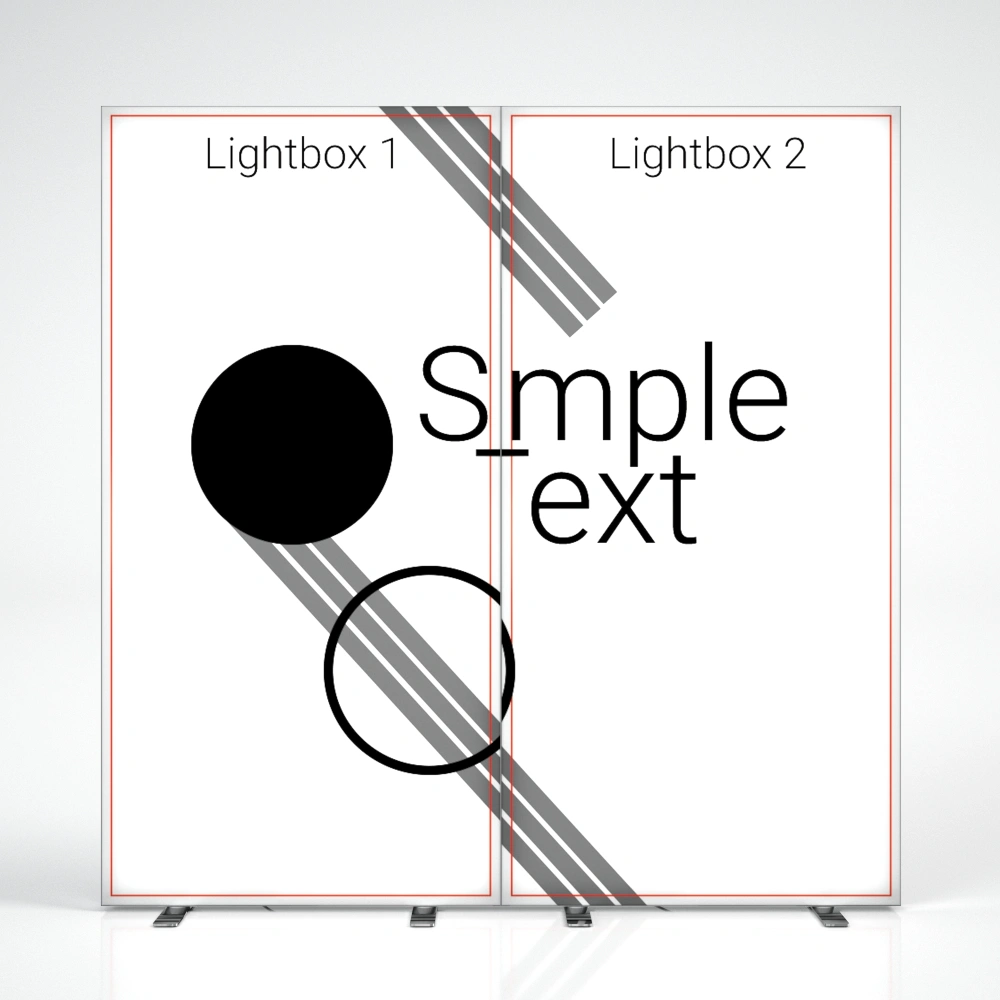
Źle
Jak przygotować pliki pasowane?
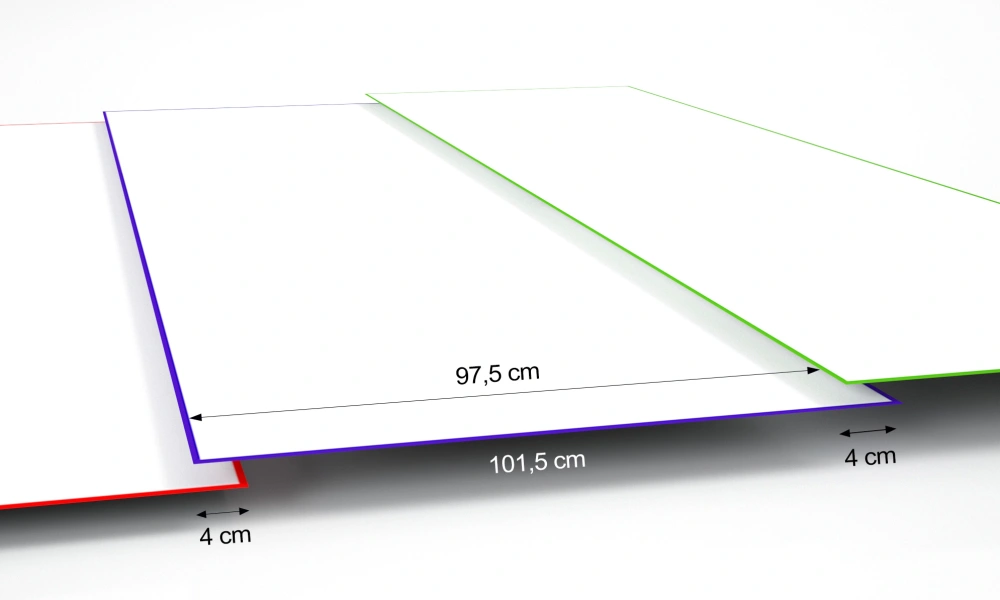
Zasada przygotowywania plików pasowanych jest prosta: każdy kolejny plik powinien zawierać 4 cm* obrazu z poprzedniego, aby zachować ciągłość grafiki. Poniżej znajdziesz schemat przygotowany na bazie wytycznych do wydruku 100×250 cm:
Jak przygotować pliki pasowane w praktyce? Zapoznaj się z krótką instrukcją, przygotowaną przez nasz zespół graficzny.
*Uwaga!
W przypadku systemów SEGO obszar wspólny wynosi 3 cm. To wyjątek od reguły.
Podsumowanie
Przygotowanie plików pasowanych może brzmieć skomplikowanie, ale w praktyce sprowadza się do kilku prostych zasad. Zawsze pracuj na wytycznych pobranych ze strony, pilnuj wymiarów i zostawiaj obszar wspólny – 4 cm (albo 3 cm w przypadku systemu SEGO) między kolejnymi plikami. Dzięki temu grafika płynnie przejdzie przez wszystkie systemy, bez przerw i przesunięć.
Jeśli zastosujesz się do tego schematu, Twoja ekspozycja będzie w pełni zgodna z projektem, a dodatkowo – unikniesz zbędnych poprawek i stresu tuż przed drukiem.


- Druk
 Recykling grafik reklamowych – jak nadać im drugie życie po sezonie
Wiele firm wciąż traktuje grafiki jak materiały jednorazowe. Kampania się kończy i wydruk znika z obiegu, choć spokojnie mógłby dostać drugą szansę. Podobnie z konstrukcjami – jedna z nich może obsłużyć wiele wydarzeń, jeśli tylko dać jej możliwość. Zobacz, jak możesz wykorzystać już posiadane materiały – na eventach i nie tylko.
Czytaj więcej
- Druk
 Rewolucja w produkcji kasetonów – szybciej i precyzyjniej
Nie lubisz nerwowej atmosfery przed targami? My też nie. Dlatego zamiast gonić czas, postanowiliśmy go wyprzedzić. Do naszego parku maszynowego wprowadziliśmy nowe urządzenie – ploter tnący ZUND. ZUND automatyzuje proces cięcia, zwiększa precyzję i minimalizuje ryzyko błędów. Zobacz, jak nowa maszyna może przyspieszyć realizację Twojego następnego zamówienia.
Czytaj więcej - DrukJak przygotować pliki pasowane? Poradnik krok po kroku
Planujesz ekspozycję złożoną z kilku elementów danego systemu, ale z jedną wspólną grafiką? Sprawdź, jak poprawnie przygotować pliki pasowane, aby uniknąć przesunięć i poprawek przed drukiem.
Czytaj więcej - Kasetony reklamoweDruk
 Jak projektować nadruki na kasetony?
Kaseton często jest pierwszym punktem kontaktu odbiorcy z marką w przestrzeni fizycznej. Wyróżnia się światłem, formą i przekazem. Oddziałuje na zmysły jeszcze zanim odbiorca wejdzie w interakcję ze stoiskiem czy ekspozycją. To właśnie wtedy – w ciągu zaledwie kilku sekund – toczy się gra o to, czy Twój komunikat zostanie zauważony i zapamiętany. Dlatego nadruk na kasetonie musi być czytelny, przemyślany i dopasowany do przestrzeni. Zamiast przeładowywać projekt, lepiej postawić na prostotę i dobrą hierarchię. W tym artykule znajdziesz sześć wskazówek, które pomogą Ci zaprojektować nadruk gotowy do działania.
Czytaj więcej - Druk
 Druk na materiałach reklamowych – co warto wiedzieć o sublimacji i solwencie?
Gdy zamawiasz ściankę reklamową, prawdopodobnie spotykasz się z pytaniem: druk sublimacyjny czy solwentowy? Dla osób spoza branży to często brzmi jak żargon techniczny, ale różnice między tymi metodami naprawdę mają znaczenie – wpływają na wygląd grafiki, jej trwałość i to, na jakim materiale da się ją wykonać.
Zanim przejdziemy do porównań, zacznijmy od podstaw: co właściwie oznaczają te nazwy?
Czytaj więcej